Author Archives: brittanyvail

..Herb Fairies..

I wanted to take a few minutes and share a great herbalism education source for kiddos courtesy of Herb Fairies, a collaboration of Learning Herbs and Mountain Rose Herbs. Follow the first link for two great free downloads. The first is a children’s cookbook featuring some great kiddo friendly options that incorporate herbs. The second download is a bonus activity book. The recipes are fun and easy, and even enjoyable for the adults in the family. My next grocery shopping trip will have a few additions, that’s for sure!  Herb Fairies and Learning Herbs are two wonderful resources for herbal education, particularly for children. But whether you’re a big kid or a little one, the information is amazing :).

For more information about Herb Fairies, see this information from the website:

Herb Fairies is our herbal learning system for kids. It includes stories and hands-on activities so kids learn how they like to learn…with you, having fun.Please watch this short video that gives you an overview of Herb Fairies.Also, download our Herb Fairies Cookbook below. Herb Fairies makes it simple to learn.

If you make any of the recipes in the cookbook for your children (or yourself, because let’s face it, they look and sound delicious!!!), I’d love to know how they liked them :). Maybe I can get my two to cooperate with some cooking videos using the recipes in the free cookbook download!


..Grilled Wild-Caught Crab..

Joel has been doing a lot of the cooking lately while I’ve been slammed with extra studying and finishing up coursework. He’s been so amazing with it all :). I’ve been nagging him about snapping some photos so we can add recipes to the website, but he says it “diminishes his man skills in the kitchen” lol. Cause you know.. photography.. it’s so emasculating when you’re wearing a Vera Bradley apron and jammin’ to Hanson’s Live From Albertane album while dancing the Truffle-shuffle with Eowyn ;).

The other week we stopped in at Whole Foods after church. We hadn’t been in the Oracle store since it was remodeled, and I’ve been wanting to check it out. Elodie spent the entire drive to church begging for “tree stars” and “green food”. Seriously.. if you don’t know what those are, you need to watch The Land Before Time movies! But anyway, we stopped into Whole Foods so Elodie could pick out some vegetables. The remodeled store looks amazing! We should have popped in long before now. The fish counter had a great wild-caught selection, including these beautiful crabs. They were huge! And so reasonably priced. We snagged one to split between us for supper. They were big enough to feed two!

..Grilled Wild-Caught Crab..

Because we had just picked up a small charcoal grill, Joel decided he wanted to grill them crab. It was pretty windy outside, so it took us a while to get the grill going. And when I say “us” I really mean me. Because I got the grill going like the awesome woman I am :). The embers were glowing and hot, and it was a perfect temperature for a slow grilling of the crab. Joel cooked the crab for about 30 minutes, but he did burn it slightly. He was a little distracted with the girls and Minnie. I would say to check it after about 10 minutes depending on how hot your coals are. Our crab would have been perfect after about 20-25 minutes.

Even though it was a little charred, it was absolutely delicious! I plan on heading back to Whole Foods on at the first of the month to see if they have any more of those delectable crabs! We left the crab completely unseasoned, and the flavor was great. I wouldn’t have added a single thing to it. It’s a wonderfully easy and IC friendly meal that can thrown together at the drop of the hat and with very little effort.

Grilled Crab

..Natural Birth and Baby Fest & Essential Oil Raffle Winners..

I’m only just now realizing this as I type up this entry.. I probably should have snagged a couple of photos of the table at the event! This was my first time doing something like this (thank you Natalie for inviting me to tag along!), so I didn’t even think of snapping a few photos. Next time!

The Tucson Natural Birth and Baby Festival was such an enjoyable event. It was great getting to spend so much time just talking with people about aromatherapy, and I met some truly amazing and inspiring people today! Hopefully I can work around my schedule to do more events like this in the future.

And did you know that you can make jewelry with breast milk? That has to be just one of the coolest things I saw at the event. The company is called Indigo Willow Breast Milk Jewelry and Keepsakes. You absolutely have to check out that website if you’re a nursing mama or plan on being one if the future :). She showed me a necklace she had made using her own breast milk, and it was beautiful.. like a perfectly little pearl. Just the coolest and prettiest thing!

There were so many wonderful vendors. It was a pleasure to talk to so many different men and women about their particular niches. Make sure you click on the link for the festival to see all the different vendors that were there!

Our table was hopping for the majority of time, and we had over thirty raffle contestants!!! There were a total of nine prizes to be given out: three larger ones and six smaller, but equally awesome, prizes. To pick the raffle winners, I used RandomPicker. To find the drawing protocol, please visit: https://www.randompicker.com/protocol/176224×84332.

So what where the prizes???

First Prize- 1 Bottle of Thieves All Purpose Cleaner, Lavender Spray, Aromatherapy Clay Necklace, and Single Essential Oil Samples. (Courtesty of Natalie Uy- oilme.blogspot.com )

Second Prize- 1 15-ml bottle of Thieves Essential Oil Blend and 1.8 oz Jar of Tummy Crack Cream- great for stretch marks, lines and wrinkles, scars, and anything that might be happening to your skin ;).

Third Prize- Aromatherapy Clay Necklace of Your Choice, Tummy Crack Cream Sample, and 1 5-ml bottle of Valor Essential Oil Blend.

Fourth Prizes- (there are SIX winners!!!)- Samples of: Sweet Orange Essential Oil, Tummy Crack Cream, and Nurturing Prenatal and Kiddie Calm Teas. (One prize bag will have two of the prenatal teas instead of one and one.)

And the Winners Are…

First Prize- Bonnie Golden

Second Prize- Danielle Blumer

Third Prize- Winnie

Fourth Prizes- Shelby Abramson, Beth Garrett, Julie Adelson, Lyndsey Duncan, Erin Yee, and Monica Luna


Ladies, I will be contacting each of you about your prizes. I really hope you enjoy them :). And here’s to more giveaways/contests/raffles in the future! Also, there were dozens of people that asked whether or not I had a facebook page, and while I do not have one right now, each one of them requested that I make one. Clearly it’s time I bite the bullet on this one ;). So that will be in the works as well. This website is still in it’s infancy stage, and I hope to add more information on aromatherapy, health and wellness as I go along. I will add any future events I plan on going to and any future giveaways directly to this website. And if any of you would like to see something in particular, please let me know!


***The information contained on this website is not meant to diagnose, treat, cure, or prevent any disease. None of the information or statements found on this website have been evaluated by the Food and Drug Administration. Products on this side are not intended to diagnose, treat, cure or prevent any disease. If you are pregnant, nursing, taking medication, or have a medical condition, please consult your physician AND pharmacist before using these products. Please be sure to always declare any herbal, nutrition, and aromatherapy products to your doctor. Information on this site is meant for educational and informational purposes only, to help motivate you to make your own healthcare and dietary decisions based upon your own research and in partnership with your health care provider(s). It should not be relied upon to determine dietary changes, a medical diagnosis or courses of treatment. 

..Natural Birth and Baby Fest..

Hello everyone :). You’ll find me at the Natural Birth and Baby Fest tomorrow from 9:30 am to 2 pm. My friend Natalie and I will be manning an essential oil both with some really awesome information, goodies for sale, and some really terrific raffle prizes!

If you’re in the Tucson, Arizona area, please come check us out! There are also going to be a lot of other amazing vendors and educational seminars!

For more information check out:

About the Fest.

I hope to see some of you there!

..Garlicky Mushrooms, Kale and Chicken with Spaghetti Squash..

My IC pain and cataplexy symptoms have been very bad lately. This is probably the worst spell I have had in years, and it shows no signs of letting up.

My husband, Joel, has been an absolutely dear over the last few weeks. He’s been helping with the cleaning, laundry, supper prep, and even cooking occasionally. And he’s actually been following my recipes for suppers! The man can really cook when he wants to :).

He made a delicious meal using my recipe for Garlicky Mushrooms, Kale and Chicken with Spaghetti Squash. He did a wonderful job. The dish was full of flavor, and he prepared it perfectly! I couldn’t get him to take photos for the blog, but I did manage to snag a photo of my plate. We’ll definitely make this one again and again! It made delicious cold leftovers too. And Joel is a huge fan of garlic, so even though he hates mushrooms while I absolutely love them, he still found the entire dish incredibly yummy!

Garlicky Mushrooms, Kale and Chicken with Spaghetti Squash

 – 1 medium cooked organic spaghetti squash

– 2 tbsp of organic olive oil

– 6 cloves of organic garlic cloves, minced

– 3 cups or organic baby portobello mushrooms, chopped

– 1 tbsp of organic thyme

– 1 to 2 chicken breasts cut into strips (might need two depending on the size)

– 4 cups of organic kale leaves

– zest of 1 organic lemon (optional)

– sea salt

– 1/8 tsp of organic cayenne pepper, or to taste (optional)

Start with cooking your spaghetti squash. You can either roast it or make it ahead of time in the crockpot, which is what I did. To cook it in the crockpot, place the squash in the crockpot with a cup of water. Cook on low 8-10 hours. I let mine go a little longer that that. I fell asleep. So when Joel went to pull it out of the crockpot, it burst open when he touched it! No cutting required lol.

Add olive oil to a skillet and heat on medium. Add the minced garlic and mushrooms. Saute for five minutes, stirring, until the garlic is fragrant and the mushrooms have browned.

Add strips of raw chicken and cook about 1-2 minutes before adding the chopped kale leaves. Cook an additional 3-5 minutes or until the chicken is thoroughly cooked through.

Next add the lemon zest (optional), sea salt, and cayenne pepper (optional). Stir and cook an additional minute. Remove from heat.

Strip the spaghetti squash into strands using a fork. Place in a bowl. Add the chicken, mushrooms, and kale. Toss together and serve. You can also serve a little rated cheese over the top :).

This was a delicious meal that was bursting with flavor, and the leftovers were just as great. It’s a quick and easy meal. And it’s IC friendly :).

..Butternut Squash Linguine..

I found this recipe somewhere, but for the life of me I can’t remember where that was. The original recipe called for making the entire dish in a crockpot. There was something about softening the butternut squash in the microwave to peel and cube it before cooking in the crockpot. Well, I didn’t make it that way. For one thing, we don’t use our microwave that often anymore. Once I convince my husband to let me get some bamboo steamers, we won’t be using it at all. I made a few tweaks to the recipe, although I did cook the whole squash in the crockpot the day before, and I added an extra spice to come up with something light and delicious.

Butternut Squash Linguine

– 2 to 3 pound organic butternut squash

– 2 tbsp of organic coconut oil

– 1/2 a small organic onion

– 3 cloves of organic garlic

– 2 cups of organic vegetable or chicken stock

– 1 tsp organic sage

– 2 tsp of organic basil

– 1/2 tsp of sea salt

– 1/4 tsp black pepper

– cooked organic pasta of your choice

Start by cooking your butternut squash. I did this using a crockpot. I had a butternut squash and a summer squash that I needed cook, so I just tossed both into the crockpot. I added one cup of water and cooked on low for 8-10 hours. Mine went a little past the 10 hour mark.. because I fell asleep lol.. so the squash burst open with a single touch. Made it easier to scoop everything out though! Remove the pulp and seeds. Scoop out the butternut squash meat and set aside until you’re ready for it.

Cut the onions into cubes and the garlic into slices. You’ll be blending it up, so you don’t need to worry with mincing or chopping. Melt 2 tbsp of coconut oil in a pot or deep skillet. If you dislike the taste of coconut, you can always add a pinch of sea salt to the melted coconut oil. It will neutralize the coconut flavor. Saute the onions in the coconut oil. Ad the garlic and cook until fragrant.. about 30 seconds or so.

Add your butternut squash and organic stock to the onions and garlic. The original recipe calls for vegetable stock, but I was all out. I used organic chicken stock instead. The flavor was still amazing, so either type of stock works out great! Stir together until combined.

Add the organic sage, organic basil, sea salt, and black pepper (or your IC Friendly alternative). Bring to a slight boil and simmer for 10 minutes.. just to let everything mix together nicely. Now it’s time to blend it all together. I used an immersion blender. Be careful when using one! They can easily splash and the butternut sauce is HOT. You can also pour it into a blender.

For this next step you can use a refrigerated pasta, fresh pasta, or cooked pasta. I used organic gluten free noodles that I grabbed at Costco. They are absolutely delicious! Take whichever of three options you’d like and mix into the sauce. If you are using refrigerated or fresh pasta, cook 5-10 minutes or until pasta is tender. If you’re using cooked pasta, just mix it into the hot butternut sauce.

Joel wanted veggies added to the butternut squash linguine instead of something like chicken, so I added roasted broccoli and mushrooms to out dishes. We had some tomatoes to use up, so Joel also had some fresh tomatoes chopped up and mixed in with his serving. I am having an incredibly rough time with my IC, so I didn’t want to worry about any cross-contamination with the tomatoes. I used a separate bowl to mix Joel’s portion. The taste was light and had a slight spicy sweetness.

This butternut squash linguine was very filling! We even got Eowyn to eat some of it, but then again, she did think the sauce was cheese lol. Ignore the ‘maters in the final photos ICers :).

The added vegetables went nicely with it, and we can add chicken to the leftovers for another meal this week :). Next time we’ll have to try adding asparagus and shrimp!

..Warm Kale and Ancient Blend Quinoa Salad..

This recipe for Warm Kale and Ancient Grains Quinoa Salad was a huge hit with my husband and his coworkers. The original recipe can be found in the cookbook Crazy Sexy Kitchen by Kris Carr. I made a few adjustment based on my own personal food allergies and tastes :). It is easily made into an IC friendly recipe with a few suggestions. I served this kale and quinoa salad with my Slow Baked Dutch Oven Chicken Drumsticks and Garlicky Potatoes. The heartiness of the chicken and potatoes paired very nicely with this light, nourishing salad!

Warm Kale and Ancient Blend Quinoa Salad

– 3 cups of Sonoma Valley Farms Ancient Blend Organic Quinoa

– 3.5 cups of water

– 2 cups of chopped organic kale

– 4 tbsp of thawed frozen organic pomegranate seeds

(You could also use currants, raisins, and dried cranberries or blueberries)

– 4 tbsp of unsalted pistashios

(You could also use pine nuts, walnuts, or almonds)

– 2 tbsp of fresh organic lemon juice (optional)

– 1 tbsp of non-GMO avocado oil (or olive.. I just like the taste!)

– Sea salt and black pepper to taste (optional)

Add the water and quinoa ancient blend to a pot on medium heat. Bring the quinoa to a simmer. Reduce the heat to low, cover, and cook for 16-18 minutes (or prep as your quinoa bag instructs). Remove from heat and fluff with a fork.

Chop the kale. Whether or not you remove the stems is up to you. Personally, I love the slightly bitter taste that comes from the stems. I’m just that person that likes sour and bitter flavors. The stems have amazing therapeutic properties and contain tremendous amounts of nutrients and antioxidants. You lose a lot by not eating, but it’s a personal taste preference. I left my stems attached. The sweetness of the pomegranate seeds complimented the tartness of the stems perfectly. Add the chopped kale on top of the quinoa and cover for a few minutes to allow the kale to steam. We like our kale still crunchy, so I only left mine covered for 3-5 minutes.

Next add the pistachios, pomegranate seeds (or your IC friendly fruit or seeds), lemon juice (IC optional), avocado (or olive) oil, sea salt (optional), an pepper (optional).

Mix all of the ingredients thoroughly. Serve warm or cold.

..IC Friendly Alternatives to Black Pepper..

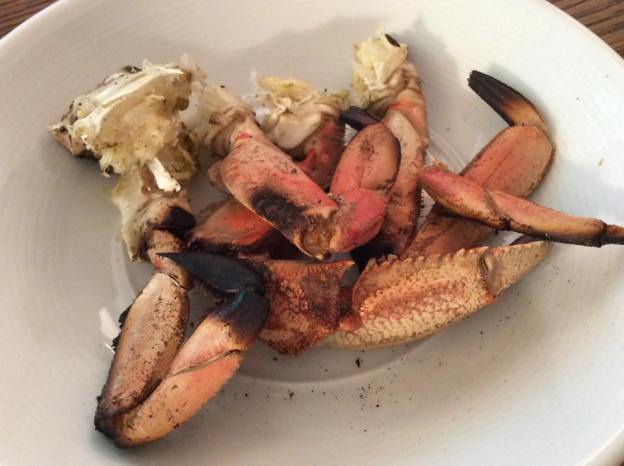
Black pepper can be incredibly irritating to some with IC because of its high oxalate content. Luckily for me, I don’t usually have a problem with black pepper. I love pepper. I cook with all different types of pepper, and I adore all the different flavor combinations that result from different peppercorns. A lot of food bloggers and reviews call black pepper crass. I even read a foodie article a while back that claimed black pepper made food “taste cheap” and “masked poor quality”. I believe that chick needs to readjust her taste buds, pick a new peppercorn, change how she’s using black pepper, or else go somewhere else to eat. Black pepper can either make or break a dish. Too much, and you’ve pretty much ruined it. Too little, and you can’t taste it. But when used in the right amounts, black pepper can really help to define a dish. So excuse me while I wholeheartedly disagree on the black pepper hating :).

But what are you supposed to do when the mere thought of freshly ground peppercorns sends your bladder into the darkest parts of hell?

You’ll find plenty of blogs, articles, and comments online about replacing the “heat” of pepper. I’m not talking about heat. I’m talking about the beautiful flavor that comes from using black pepper. It’s not something that can be replaced by subbing in a little bit of heat.

So what can you use to get a similar flavor to black pepper? Nothing can give you exactly the same flavor as using freshly ground black pepper, but there are other options to get a “peppery” flavor.. options that don’t involve heat. Some of these options are better than others :). We each have our own taste for pepper, and some herbs are more peppery than others!

Black Pepper Essential Oil

Many people, myself included, have found that essential oils are a great alternative to herbs and spices we wouldn’t normally be able to eat because of dietary restrictions (And I’m not meaning allergies here people! Food and plant allergies should NEVER be ignored when using essential oils!!!). Black pepper (Piper nigrum) essential oil is steam distilled from the berries. Black pepper essential oil will be a hit or miss.. just like other herbs, spices, and essential oils. But if you really don’t want to give up using black pepper to cook with, the essential oil might be something you would like to try. A little goes a long way. Less is more when cooking with essential oils. You will rarely ever need to use more than a single drop or two, and most of the time you won’t even need to use that. To use less than a full drop, use a glass dropper to add the oil to food instead of turning the bottle upside down. The essential oil has a gently pungent bite with a lasting flavor. Black pepper essential oil can be added to marinades, dips, sauces, or soups.. anything liquid. You can also add it to mashed vegetables, a single (or less) drop to melted butter or oil before cooking, or meats.

Black pepper essential oil should come from a quality source: organic or wildcrafted, country of origin displayed, Latin name given, and through steam distillation. I have two essential oil companies that I not only feel comfortable ordering from (one is always out of stock of something!!), but comfortable using with my family and recommending to others. If you would like more information on where to order essential oils, please contact me. My number one concern is safe use, and I am currently studying to become a certified aromatherapist :).

Summer or Winter Savory

Summer savory has a somewhat peppery taste. It can be used as a replacement for salt and pepper. Although you can use it as a dried herb, the springs or chopped leaves will give the best peppery flavor. Winter savory, while still somewhat peppery, has a stronger, sharper, and spicier flavor. Savory is also a great source of vitamins and minerals. It is especially great with fish, chicken, stews, vegetables, and salads.

Grains of Paradise

The use of grains of paradise as a pepper replacement dates back to Medieval times. Spice traders claimed that grains of paradise came from Eden, hence the name. At the time, it was considered to be a cheaper substituent for black pepper.

Grains of paradise has a zesty, peppery flavor with hints of flowers, coriander, and cardamom. The spice has a slowly intensifying heat, like pepper, that lingers. Most people who have had grains of paradise actually prefer it to black peppercorns. It can be bought ground or added whole to a pepper grinder.

Ground Papaya Seeds

Oddly enough, Ground papaya seeds can  be used as a pepper replacement! Who would have thought? Ground papaya seeds can be scooped straight out of the fruit and eaten raw. They’re similar to capers, although not pickled. Ground papaya seeds have a spicy, slightly pungent taste. They can be  used with a pepper grinder. It makes an exotic pepper alternative that is difficult to distinguish from regular black peppercorns.

To use papaya seeds, scoop the seeds fresh from a papaya. Place in warm water and work with your hands to remove the pulp. Let the seeds soak overnight. Bake at 170° (or the lowest temperature your oven will go) for 60 minutes or until the seeds are hard. Cool the papaya seeds and place in a pepper grinder. Use as you would pepper :).

Papaya seeds are full of beneficial enzymes and very good for you! Papayas are not IC friendly for everyone. While some ICers can eat papaya, others cannot. Papaya is listed as a “Worth Trying” food on the IC Food List. Seeds from vegetables are typically IC safe for the majority of people though.

Parsley

If you’re looking for a slight peppery flavor, parsley is the herb for you. Not only does parsley have therapeutic properties that cater specifically to cystitis, it is also full of beneficial nutrients. Parsley enhances the appearance and flavor of most foods. It has faint celery like flavor with a delicate peppery taste. The flat leaf (Italian) variety of parsley should be used, and while you can use the dried herb, fresh parsley is always best. It can be used generously with all foods.

Basil

Basil is another alternative is you are looking for a slight peppery flavor. It has a sweet, warm, slight peppery spice to it. It can be used whole, chopped, or shredded. It pairs well with sauces, stews, salads, to make pesto, on cheese, in pasta, and with meats and poultry. Basil is one of my favorite herbs. It lends an amazing flavor when used shredded on fresh fruit with raw honey! Basil is also very beneficial for the digestive process.

Mediterranean Oregano

Mediterranean (Greek) oregano has a warm aromatic and pungent flavor. It has a distinct peppery flavor, however, it is on the sweet side. It pairs very well with basil, especially when used in sauces, roasted vegetables, and IC friendly pizzas! It can lend a sweet peppery taste to cream sauces, salad dressings, soups, butters, egg and cheese dishes, and with foods cooked on a grill.

Sage

Sage has an aromatic, woodsy flavor that is slightly peppery. It can be quite strong. It is bested used with stuffing, omelets, fish, meat, an poultry dishes. The whole for chopped leaves can be used for the best peppery flavor. There are several variations of sage, each on with a slightly different hint of pepper.

Thyme 

Thyme is another herb that is only slightly peppery. It’s an indispensable herb in the kitchen, with a spicy slightly sweet peppery flavor that goes well with all foods, salads, stews, sandwiches, and vegetables. It blends well with marjoram to digest fatty foods, and with IC, optimal digestion is a plus :). The springs or stripped leaves can be used. Whole stems can be used in soups or stews, but make sure you remove them before serving!

What herbs and spices do you substitute for black pepper? Do you have a favorite? Have you tried any of the alternatives in this post? Let me know in the comments!


***The information contained on this website is not meant to diagnose, treat, cure, or prevent any disease. None of the information or statements found on this website have been evaluated by the Food and Drug Administration. Products on this side are not intended to diagnose, treat, cure or prevent any disease. If you are pregnant, nursing, taking medication, or have a medical condition, please consult your physician AND pharmacist before using these products. Please be sure to always declare any herbal, nutrition, and aromatherapy products to your doctor. Information on this site is meant for educational and informational purposes only, to help motivate you to make your own healthcare and dietary decisions based upon your own research and in partnership with your health care provider(s). It should not be relied upon to determine dietary changes, a medical diagnosis or courses of treatment. 


..Slow Baked Dutch Oven Chicken Drumsticks and Garlicky Potatoes..

We ended up with a ridiculous amount of potatoes from our organic grocery delivery service. Funny thing about that.. nearly half the potatoes were completely rotten! Needless to say, we were not pleased. As y’all know, I have loved my Matt’s Organic Deliveries since we started ordering their product last fall. We’re not loving them anymore. In fact, we’re switching to a different organic produce company because of all of the problems we’ve been having. Our last two months worth of orders were absolutely sorry quality. Not only did we notice that we were getting less produce in their largest box compared to last fall, but half the food was either already rotten or a day or two from it. For $90 a box, I honestly expected more, especially after we complained three times about the quality. When potatoes and onions are rotting, you know a company has slipped on quality control. It was very disheartening, but we’re happy to have found an alternative that I will be posting about in April. Did I mention that we have over 15 heads of garlic??? Yeah, we received those is two deliveries. Just two. Fifteen heads. Sigh. We just do not eat that much garlic! I’m trying to find ways to use it up before it rots like everything else.

Anyway.. I had several pounds of on-their-deathbed potatoes and onions to use. Not to mention the ridiculous amount of garlic that Matt’s has been delivering to us. I decided to make a one dutch oven slow cooked chicken and garlicky potato meal :).

The slow baked chicken came out fall off the bone tender. The meat was pulling off as soon as I started pulling drumsticks out of the cast iron! My husband, Joel, was very happy with the garlicky potatoes! Eowyn was fighting him for the potatoes he had on his plate. She ate half of what was there. They dove in for seconds, and Joel even took some of the leftovers to lunch the next day. And then he came home and ate what was left of the garlicky potatoes lol. Apparently this recipe was a hit! Joel has requested we have it again sometime soon.

I paired this slow baked chicken drumsticks and garlicky potatoes with a Warm Kale and Ancient Blend Organic Quinoa Salad. Click the linked name to find the recipe! Joel and his coworkers passed helpings of the quinoa and kale salad around, and there were requests for recipes. I’ve made it several times since then, and Joel loves it more and more each time! Make sure you check out the recipe!

..Slow Baked Chicken Drumsticks and Potatoes..

– 2 tbsp organic olive oil (coconut or avocado work well too!)

– 2 lbs of organic potatoes, thinly sliced

– 2 large organic onions, thinly sliced

– 3 organic garlic cloves, minced

– 1 tsp organic thyme

– 1 tsp organic rosemary

– 4 to 6 organic, pastured chicken drumsticks

– 2 thick slices of organic bacon (optional)

– 1 and 1/2 cups of organic chicken stock or bone broth (preferably homemade and no added salt for IC!)

– Sea salt and black pepper to taste

(For black pepper IC substitutions, click on the link at the bottom of the post!)

Preheat the oven to 350° and then grease a dutch oven or other deep baking dish that has a lid.

Scrub the potatoes, and slice the potatoes and onion into thin rounds using a knife or mandolin slicer. Next, mince the garlic. Place the potatoes, onion, and garlic into a bowl. Add the herbs and season to taste with sea salt and black pepper.

Be careful.. especially if your name is Brittany, and you’re writing this blog ;). I sliced a very deep, dime-sized chunk of skin off of my pinky using that pesky slicer!!! Who knew a finger could bleed that much? I had to toss about an entire pound of potatoes thanks to all that mess. So please, be careful!

Arrange the potato mixture in a dutch oven or any deep baking dish that has a lid.

Rinse your chicken with cold water and pat dry. Arrange the chicken on top of the potatoes, and season with a touch of sea salt and pepper if you’d like to. You can also use your favorite IC friendly no-salt seasoning mix. I make my own bland, and hopefully I will be able to post a recipe soon :).

Roughly chop the two thick slices of raw bacon. Sprinkle across the chicken.

Cover and bake for two hours.

If you like your chicken a little brown and you find that it needs a little extra time after the two hours, remove the lid, turn to broil (if safe!) to brown and crispy. Make sure you watch it though! It will burn quickly! The chicken legs were cooked perfectly to my husband and my liking after two hours in a cast iron dutch oven :).

**CLICK HER TO LEARN MORE ABOUT IC FRIENDLY SUBSTITUTIONS FOR BLACK PEPPER**

..Before Painting That Grout..

So I’m sitting here at home sick as a dog, so what better way to spend my day than updating this new blog! Now, on my other blog I posted an entry about painting the grout in our house. I kept saying I was going to update on how that went, but I never got around to it. I painted the grout in July of 2013 and it’s now August 2014.. it’s about time I actually do that update lol!

You can click on that link above to read the original grout painting entry, but I’ll give y’all a quick rundown. We’ve been in this house for over a year now. The original owners were the ones who laid the grout, and the wife had the bright idea to use several different grout colors.. yeah.. it was ugly as it sounded. The only room they didn’t use three different grout colors in was our master bath. Because that made perfect sense. So being the new homeowner that was trying to save money and be all handy and all that.. I decided to do a little Pinterest research on painting our ugly grout. It was backbreaking, time consuming, and not at all as easy as people made it out to be (but maybe that’s just me being a huge fail!!), but overall it looked great and was worth all the trouble. Joel and I were both really happy with how it turned out. And here’s the result:

GroutPainting.jpg

After painting the grout. The first two are the girls’ bathroom and the second two are the entryway.

But you see.. there’s one major flaw to painting your grout.. it has to be in good shape before you paint it. And ours was not. The paint itself is holding up great in the girls’ bathroom for the most part. But we have a major problem. Our tile is old, and the grout is in really bad shape. This house is over ten years old now, so that means the tile is over ten years old, which means the grout is over ten years old. And now it’s cracking and the tiles are breaking. So I did all that work for absolutely nothing! It took two day to paint one bathroom and the entryway, and almost a week to fully paint the kitchen/dining/laundry space. We ended up not painting the master bathroom, because the tiles began cracking in the kitchen only days after we finished painting the grout in there. So here’s what our grout and tile look like one year later:

groutpainting2.jpg

The grout and tile in our kitchen one year later. This is the worst of the damage to the floors.

Yeah.. it’s not a pretty site. We’re going to need to replace the floors in three of the rooms in our house starting with the kitchen. Homes in Arizona tend to have a lot of tile in them. The majority of the homes here are nothing but tile floors, so it’s a lot of square feet to replace. To top it all off, the tile was laid incorrectly. It caused damage to the concrete, so there a spots in the concrete that will need to be repaired too. It’s a huge mess!!!! Our eventual goal is to rip up all of the flooring in the house and stain the concrete. But if I had realized something like this would happen, I wouldn’t have spent the money buying the five kits.. at $24 a kit.. to paint the grout in our house.

Ultimately a very expensive lesson learned! Painting your grout.. while cheaper and effective in most cases.. will not work if you’re tile and grout just flat out need replacing. So before any of you hop on Pinterest and see how easy everyone else makes painting their grout seem, take a step back and think about whether or not you just need to replace your tile!